
Chocolate lacework
Chocolate lacework is easier to make than you would expect. It looks very fancy and adds a special finishing touch to any dessert.
First, melt chocolate using the bain marie method.
I place a ceramic bowl on top of a small pot containing a few inches of water. The bowl should fit snugly so that not too much steam escapes from the sides.Break a slab of dark chocolate into pieces and place into the bowl. Bring the water to boil then switch off the heat.
Leave the chocolate to melt slowly, stirring every few minutes. While you wait, cut out a large square of baking paper.
Fold in half & cut along the fold carefully to form two triangles.
Choose one triangle, and lay it out so that the longest side is away from you.
Take the left corner and turn it over in an arc and line it up up with the centre point facing you, so forming a cone.
Hold it in place with your thumb and forefinger. (see picture) Twist the first cone smaller so both points come together and the cone is tight with no hole at the tip.
Then fold the points over twice into the cone so that it does not unravel.

Do the same with the other corner, wrapping it around the outside of the first cone.
Now cut a small hole at the tip of the cone.
Do not cut it too large or the chocolate will come out too thick, but don't cut it too small or the stream will be too thin. Experiment to find just the right size.
Now you have a cone that you can use
to make chocolate lacework.
Spoon melted chocolate
into the cone.
 Half fill the cone with chocolate
and fold the large end over a few times.
A gentle pressure on this end should cause the chocolate to flow out of the cone in a steady stream.
Once you feel confident about directing the  chocolate,
try making shapes on a sheet of baking paper.
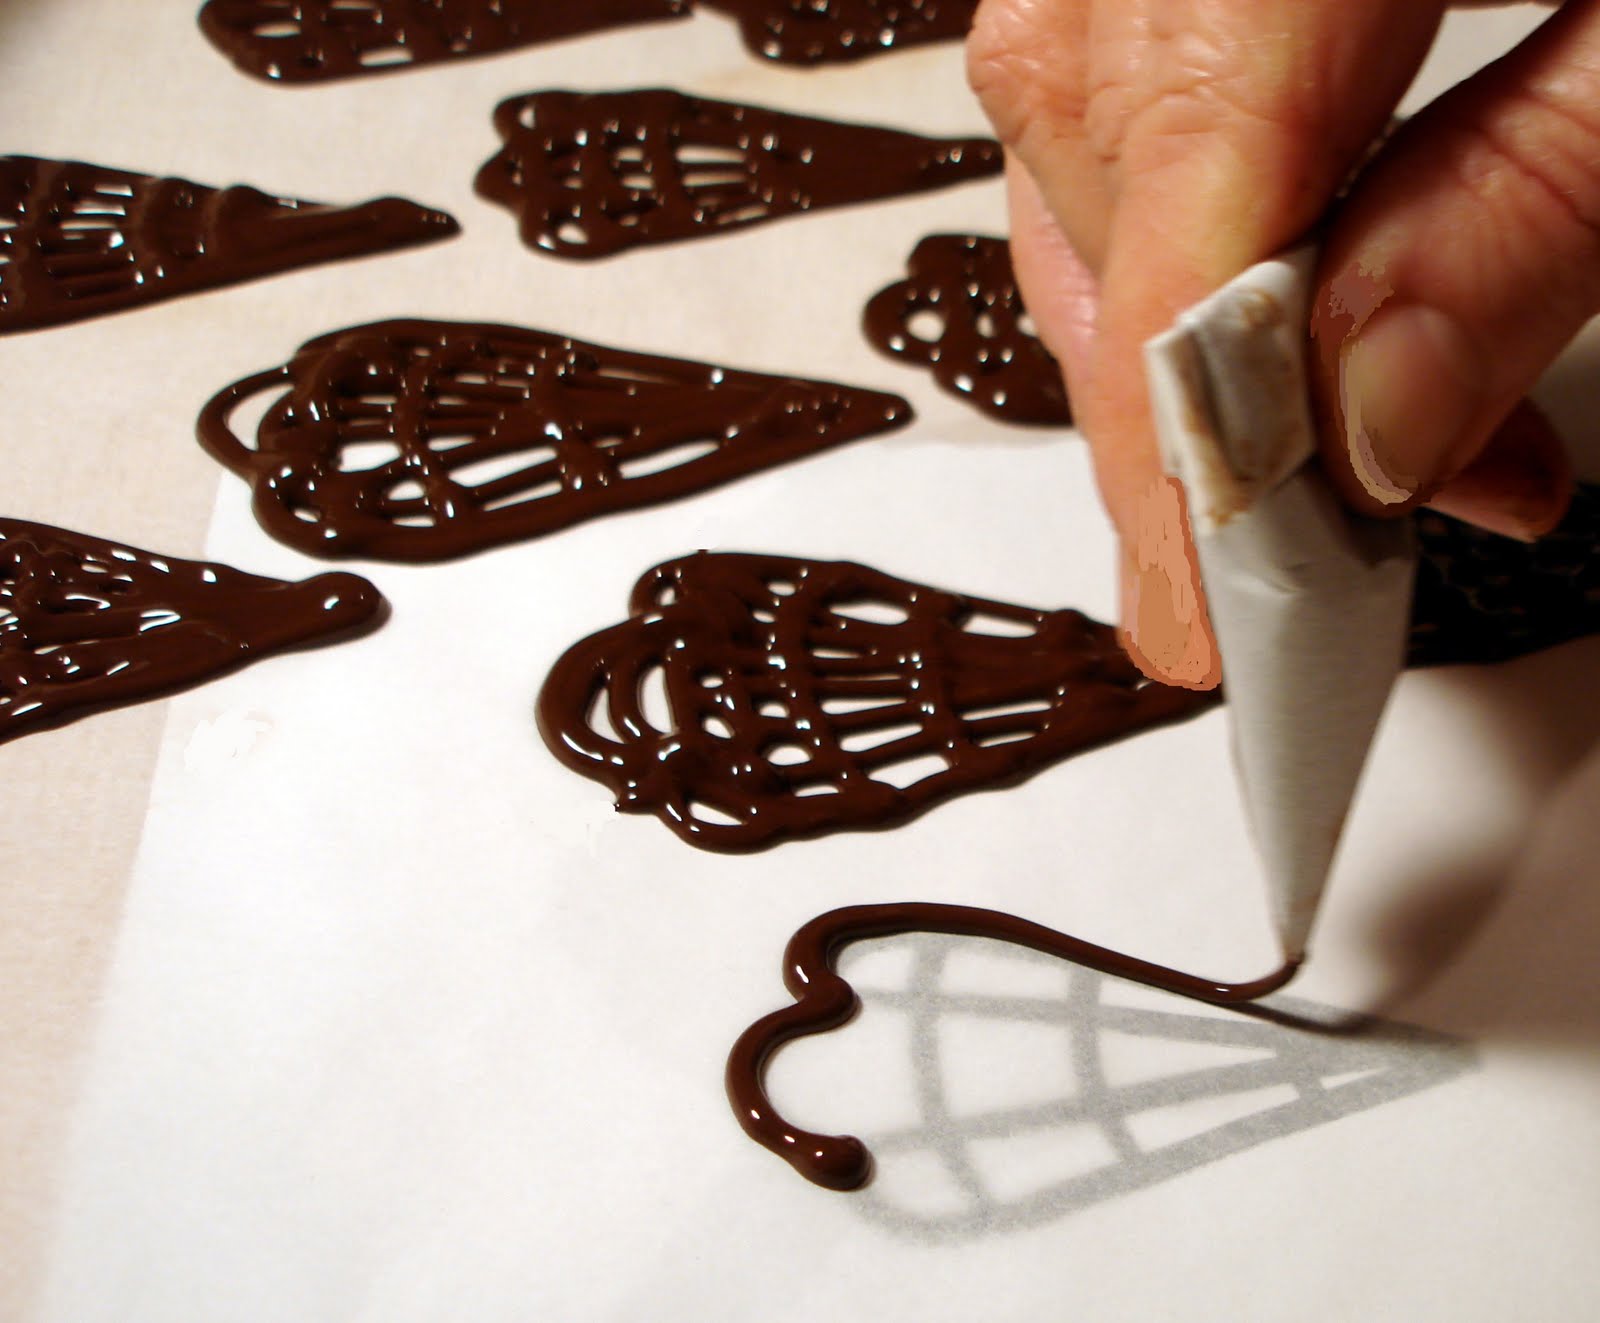
I drew a template of lace trimming & went over it
with a marker so I could see through the baking paper.
I placed the template underneath the sheet of baking paper
and then "traced" over the pattern.
Be creative! You could do any shapes from leaves to words. Pipe chocolate following the outline coming through the baking paper as seen above right.
When you are finished, allow the chocolate lacework to cool at room temperature not fridge.
The refrigerator will give the chocolate a frostbite effect.
Once dry & hard place the chocolate lacework in an airtight container. Leave on baking paper, and peel off when needed. That way the finished chocolate lacework will stay protected.
Use to garnish on any dessert and turn a chocolate mousse or a simple bowl of ice-cream
into an elegant creation.


3 comments:
I LOVE this blog!!
My goodness Muriel!!
Once again an example of the great love, care and detail you put into everything you create! You are an inspiration!
Thank you for sharing your gift and amazing ideas with everyone, with such enthusiasm and excellence!!
Bless you!
xx
Thank you my dear Nicki and Maryke. :)
It makes it all worth it when I get comments like yours.
Post a Comment